KGPE-D16 (Raptor)
| KGPE-D16 | |
|---|---|
 | |
| Overview | |
| Introduced | 2010 |
| Manufacturer | ASUS |
| Specifications | |
| Socket | 2x G34 |
| Northbridge | 1x AMD SR5690 |
| Southbridge | AMD SP5100 |
| Super I/O | Winbond W83667HG-A |
| BMC | ASPEED AST2050 (OpenBMC-compatible) |
| BMC Flash Location | Removable Module |
| Memory | 16 slots (8 channels) DDR3-1600 ECC RDIMM/UDIMM, up to 192GB on Coreboot |
| BIOS Flash | 2 MiB socketed DIP-8 (W25Q16V) |
| Form Factor | SSI EEB |
| Power Inputs | 2x 8-pin EPS |
| Expansion Slots |
|
| Onboard Peripherals | |
| Graphics Adapter | AST2050 Integrated VGA |
| Network Interface | 2x Intel 82574L Gigabit |
| Storage Controller | SP5100's SATA2 (3.0 Gbps), no SAS unless PIKE2008 installed |
| USB Controller | SP5100's onboard USB 2.0 |
| Serial Interface | One SIO-provided RS232, one virtual BMC console port |
| Audio Interface | None (ASUS recommended a PCI sound card) |
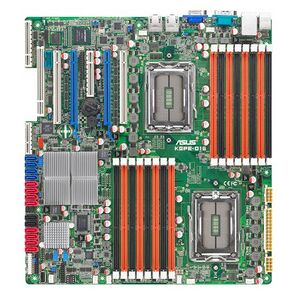
The ASUS KGPE-D16, commonly referred to as the D16, is a dual-socket server/workstation motherboard released by ASUS on April 7th, 2010[1], for use with Socket G34 Opteron processors. Originally sold as a standalone board in a mostly-standard SSI EEB form factor, and intended for both desktop and rack-mounted uses, the KGPE-D16 is popular among enthusiasts as a relatively versatile and workstation-friendly G34 platform.
Ports of Coreboot and OpenBMC to the D16 was developed by Raptor Engineering between 2015 and 2017. Among major Coreboot versions, it was first supported in Coreboot 4.2 in October 2015, and last supported in Coreboot 4.11 in November 2019. Support was dropped beginning in Coreboot 4.12, primarily due to lack of maintenance after Raptor Engineering discontinued work on the platform. Between 2021 and 2022, after seeking funding for such an effort for several years, Dasharo/3mdeb developed an out-of-tree fork of Coreboot 4.15, but it was not upstreamed, and has not been significantly maintained since 2022. At present, there does not appear to be a significant effort to re-upstream the KGPE-D16 into Coreboot.
Most KGPE-D16 owners currently use either upstream Coreboot 4.11, or one of multiple forks of it, such as coreboot-D16 or Libreboot.
RAM HCL
Raptor Engineering's implementation of raminit code for KGPE-D16 is imperfect. Hardware/firmware configurations are documented here that have passed memtest86+.
| RAM | CPU | Microcode | Motherboard | Firmware | Config | Tester | Result |
|---|---|---|---|---|---|---|---|
| Crucial CT16G3ERSLD4160B (x8) | AMD Opteron 6328 (x2) | 6000852 | KGPE-D16 1.05 | coreboot 4.11 79e40a0e7c | config.asus_kgpe-d16_seabios_vgabios | mrothfuss | pending |
3D Prints
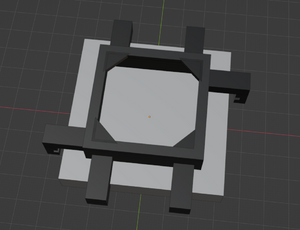
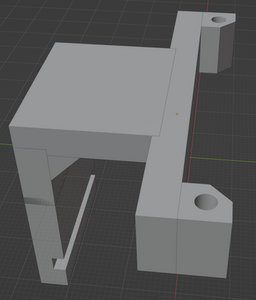
A few attachments have been designed to add cooling fans to the motherboard. Server motherboards expect to have a high amount of airflow (often loud) to keep components cool during 24/7 operation. To maintain component health in quieter builds, fan mounts have been designed.
Chipset Fan
This file is designed to work with a Noctua NF-A4x10 fan. If your motherboard is not in a high-airflow server case, the chipset fan is highly recommended. The fan bracket mounts onto the chipset heatsink by snapping onto the metal arms that secure the heatsink. The file may need to be editted to accomodate the exact placement of your 40mm fan cable (the provided design has a cable hole at the bottom right position).
KGPE-D16_Chipsetfan_40mm.blend
RAM Fan
This file is designed to work with a Noctua NF-A8 fan. When two of these fan mounts are attached to a Noctua NF-A8 fan, they will be spaced correctly to snap onto the KGPE-D16 RAM clips (white). These clips vary between boards. The included file is designed to work with L-shaped RAM clips (most often found on 1.04 and 1.05 boards). It will not fit as nicely onto the parallelogram-shaped RAM clips (most often found on 1.03G boards).
Flashing
Flashing instructions
Compatible SPI Chips
Coreboot is compatible with the 2MB chip that comes with the KGPE-D16. It is possible to expand the ROM space up to 16MB using replacement SPI chips. Heads requires a 16MB chip to work on the KGPE-D16 board.
| Model | Size (MB) | Size (Mb) |
|---|---|---|
| W25Q16BVAIG | 2 | 16 |
| W25Q64BVAIG | 8 | 64 |
| W25Q128FVIQ | 16 | 128 |
Hardware
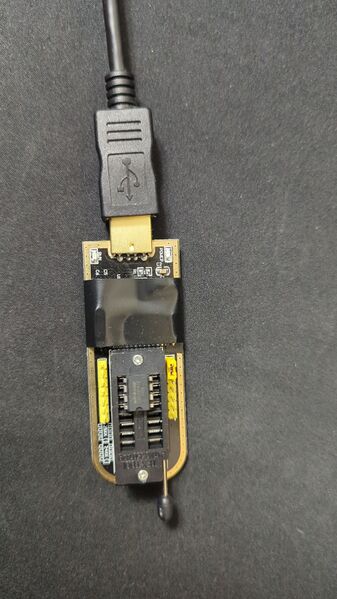
You will need a flash chip programmer like the cha341a rev 1.7 [2]
If your gonna be running something like heads you will need a 16MB flash chip like the W25Q128FVIQ[3] (OEM ch is only 2MB)
flashing the new 16MB chip
Put the flash chip in the flasher (make sure the chip in the right direction) and plug the flasher into your linux computer then use ```flashrom --programmer ch341a_spi -w bios.img``` to flash the chip (replace the programmer and file name accordingly as needed)
If your using the ch341 make sure the voltage is correct see references to ch341 configuration
placing the new flash chip
Remove the old flash chip by gently wiggling it back and though while pulling upward
Then place the new flash chip make sure its in the right orientation as indicated by the notch on the chip


